NVDA Voicemeeter
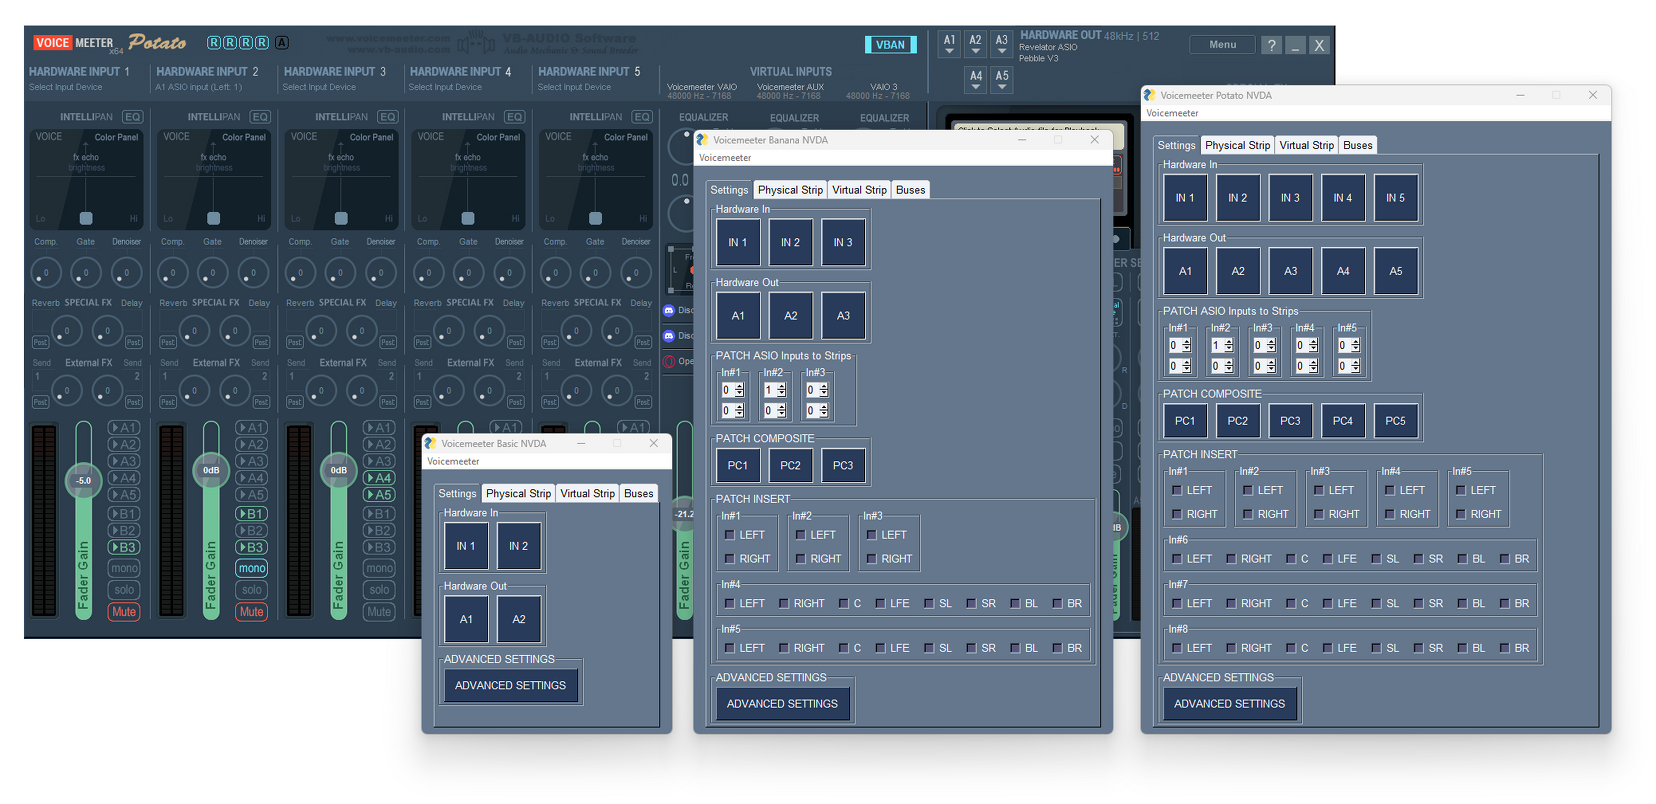
A remote control app for Voicemeeter, designed to be used with the NVDA screen reader.
For an outline of this projects goals see the SPECIFICATION.

Requirements
- NVDA screen reader
- NVDA's Controller Client files
- Python 3.10 or greater
Installation
From Source
First clone the source files from this repository and install the dependencies.
git clone https://github.com/onyx-and-iris/nvda-voicemeeter.git
cd nvda-voicemeeter
pip install .
Then download the Controller Client and place the dll files into the directory controllerClient.
Your directory structure should look like this:
├── controllerClient/
├── x64/
├── nvdaControllerClient64.dll
├── x86/
├── nvdaControllerClient32.dll
From Releases
If you want to get started quickly and easily I have uploaded some compiled versions of the app in the Releases section.
Run
Once the repository is downloaded and the controller client files in place you can launch the GUI with the following __main__.py:
import voicemeeterlib

import nvda_voicemeeter

KIND_ID = "potato"

with voicemeeterlib.api(KIND_ID) as vm:
    with nvda_voicemeeter.draw(KIND_ID, vm) as window:
        window.run()
KIND_ID
May be one of the following:
basicbananapotato
Use
Tabs
The app presents four tabs Settings, Physical Strip, Virtual Strip and Buses. Navigate between the tabs with Control + TAB and Control + SHIFT + TAB or once focused on any tab, Left and Right arrow keys.
All controls within the tabs may be navigated between using TAB.
Settings
The following controls offer context menus accessed by pressing SPACE or ENTER:
- Hardware In
- Hardware Out
- Patch Composite
Press ESCAPE to exit any context menu.
All other buttons can be triggered by pressing SPACE or ENTER.
To adjust Patch Asio Inputs to Strips and Patch Insert values use UP and DOWN arrows when in focus.
To access Advanced Settings you may press the Advanced Settings button or use Control + A when in the Settings tab.
Physical Strip|Virtual Strip|Buses
You will find in each of these tabs two nested tabs,Buttons and Sliders. For each nested tab you will find the controls appropriate for the Voicemeeter kind and channel type.
All buttons may be triggered by pressing SPACE or ENTER.
All sliders may be controlled in three different ways:
Left|Right arrowto move a slider by 1 step.Shift + Left|Right arrowto move a slider by 0.1 steps.Control + Left|Right arrowto move a slider by 3 steps.
To rename a strip/bus channel navigate to the relevant tab, then press F2. This will open a popup window where you can set the channel index (with a spinbox) and set the new label using a text input box.
Pressing the OK button with an empty text input will clear the label. In this case the label will be read as a default value for that channel. For example, if the leftmost Strip label were cleared, the screen reader will now read Hardware Input 1.
Pressing Cancel will close the popup window with no affect on the label.
Menu
A single menu item Voicemeeter can be opened using Alt and then v. The menu allows you to:
- Restart Voicemeeter audio engine
- Save/Load current settings (as an xml file)
- Set a config to load automatically on app startup.
The Save Settings option opens a popup window with two buttons, Browse and Cancel. Browse opens a Save As dialog, Cancel returns to the main app window.
Load Settings and Load on Startup both open an Open dialog box immediately.
Quick access binds
There are a number of quick binds available to assist with faster navigation and general usage.
When focused on any one of "Physical Strip", "Virtual Strip" or "Buses" you may use Control + Number to skip to the corresponding channel number.
When focused on any single channel (Strip or Bus), the following binds exist:
Control + Owill trigger the Mono buttonControl + Swill trigger the Solo buttonControl + Mwill trigger the Mute button
You may also enter slider modes which allow for control of the channels sliders until the slider mode is exited. You may access the slider modes with the following binds:
Control + Uwill enter Audibility modeControl + Gwill enter Gain modeControl + Twill enter Gate modeControl + Lwill enter Limit mode
To exit any of the slider modes press Escape.
Once you are in a slider mode you may now control the slider that matches the slider mode. Slider mode binds match the normal slider binds with the addition of the Alt keypress. For example, where you would normally use Right Arrow to shift a slider rightwards by 1 step, in slider mode you would now use Alt + Right Arrow.
Issues
If you have any questions/suggestions feel free to raise an issue or open a new discussion.
Special Thanks
Mario Loreti for his help in testing and offering feedback during development.
NVAccess for creating the open source NVDA screen reader and its controller client.
Vincent Burel for creating Voicemeeter and its SDK.
PySimpleGUI team for creating an awesome GUI framework.


