1.8 KiB
Python Installation
If you don't have Python already you can fetch it easily from the Windows Store. Simply type store into the windows search bar. To run this GUI you'll need the latest version, Python 3.11 (Beta).
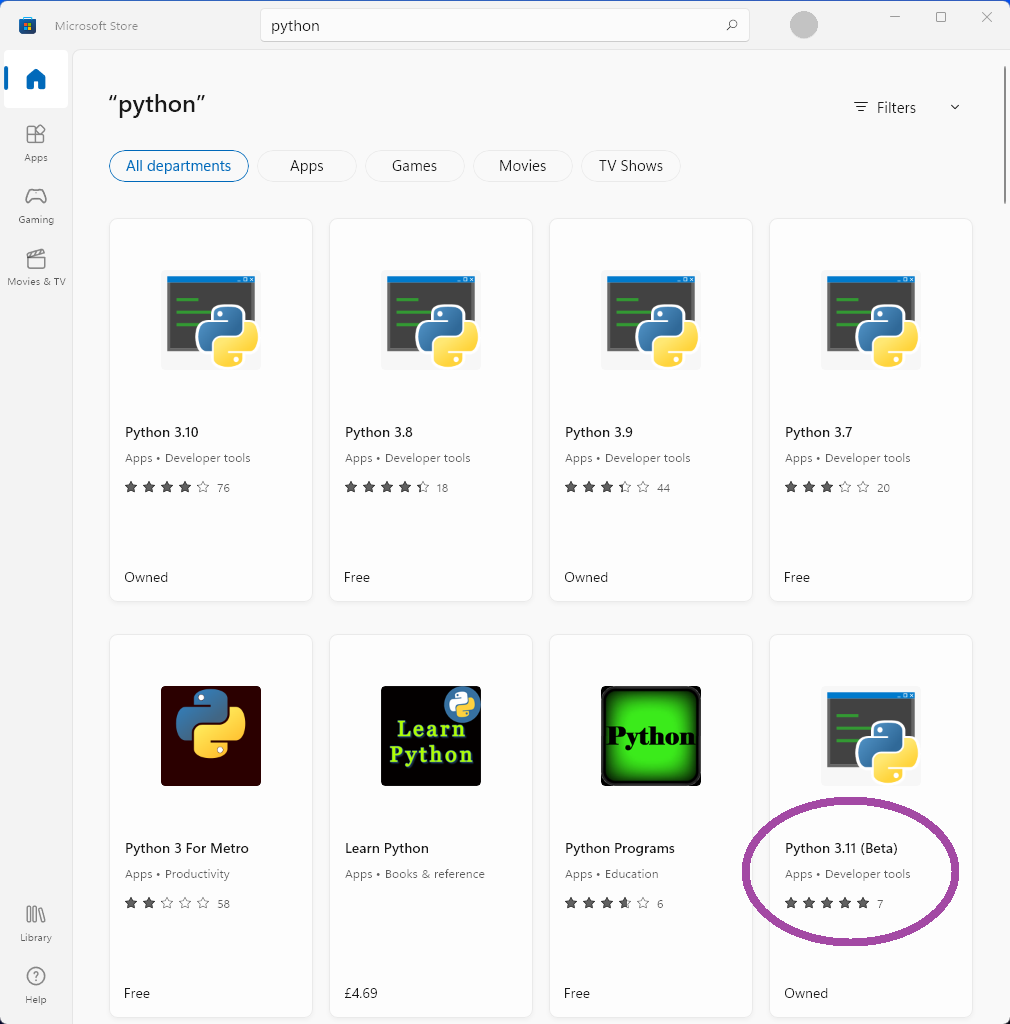
If you install Python straight from python.org instead remember to click 'Add Python environmental variables', this is important.
Install Code
Once Python is installed:
Create a directory in the location you wish to install the GUI. This can be anywhere.
Copy the __main__.py file from the code files into this directory. (Copy paste will do but ensure the file name is exactly __main__.py)
Then type powershell.exe into the explorer bar as shown in the image below.
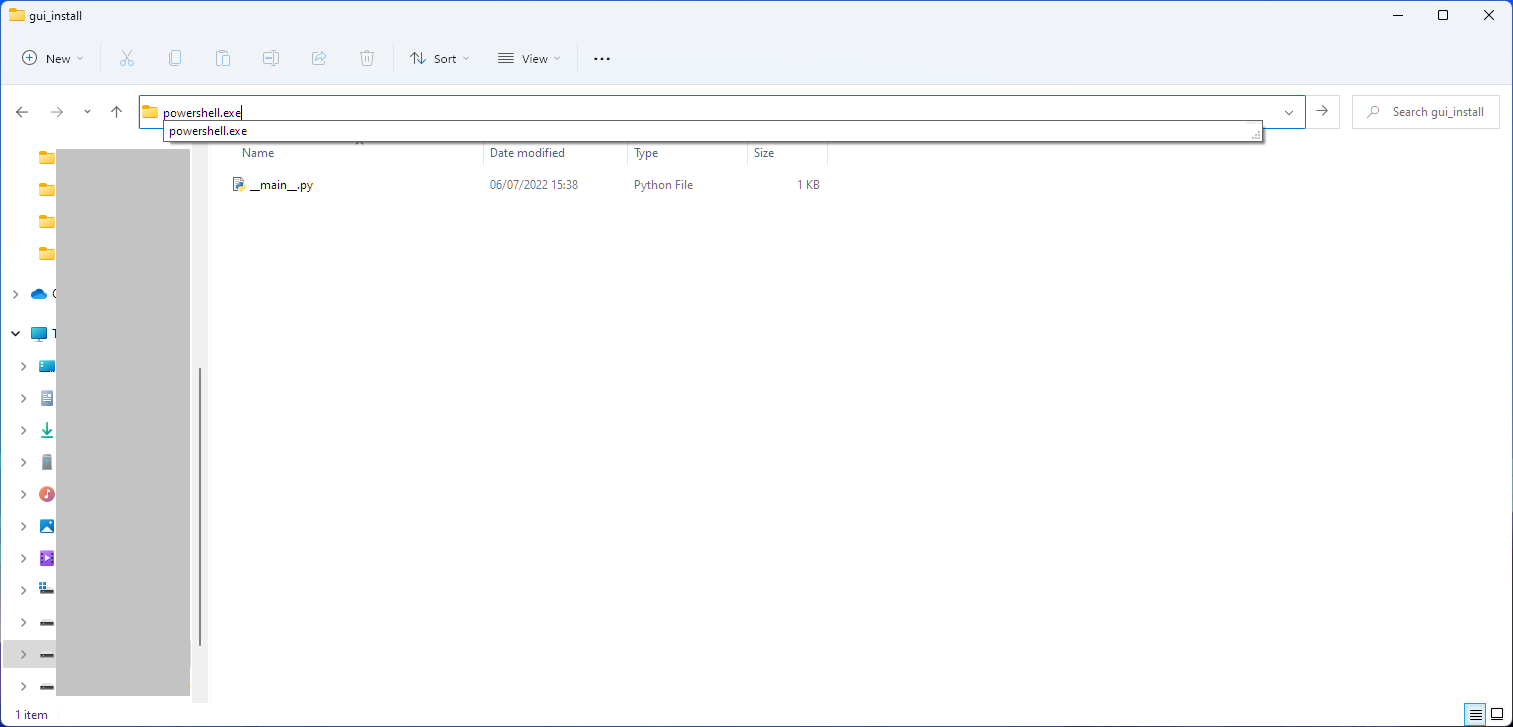
This will open a Powershell in the current directory.
Then use the command pip install voicemeeter-compact and wait for the required packages to install.
Use
You will need to set the kind of Voicemeeter you want to run in the __main__.py file. Just edit the kind_id line to one of the following:
- basic
- banana
- potato
if __name__ == "__main__":
    # choose the kind of Voicemeeter (Local connection)
    kind_id = "banana"
Finally, in powershell, run the GUI with the command pythonw .
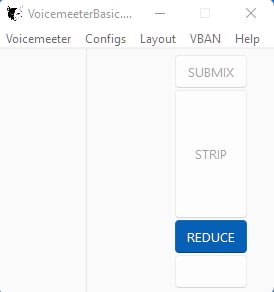
If the GUI looks like the image below when you first load it, then no channels are labelled. From the menu, Configs->Load config, you may load an example config. Save your current Voicemeeter settings first :).
Updates
If there are updates to the app, you can track them in the CHANGELOG
To install any updates simply open a Powershell in the install directory as explained above, then use the commmand pip install voicemeeter-compact -U